Overview
|
In 1571 Oda Nobunaga campaigned against the sohei (warrior monks). The Seige of Mount Hiei was a major battle of this campaign and Nobunaga's forces killed all those that lived on the mountain. This campaign is a fictional series of battles set against the backdrop of this period.
As Nobunaga travelled across the country destroying the Monasteries he tasks several minor lords with mopping up the remaining Monks in their mountain hideouts. Great rewards await the Hero that can claim the head of the local abbot. Hence two forces set off by different paths towards the Katsuragi Mountains to win fame and bring the Monks riches back to Nobunaga. |
|
The campaign is a series of linked battles leading towards the climactic battle at the Monastery, Many of the battles fought by the two teams will be identical scenarios in regard to the terrain and the Monk forces, however, their own decisions and how they fared in the preceding battles will impact on their own forces.
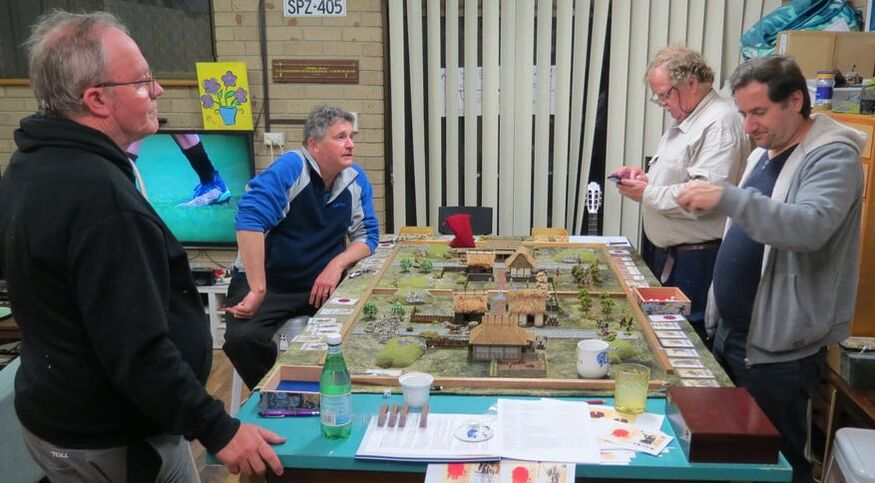
The Forces
In this campaign we have two teams lead by Greg and Paul. Each player has a lieutenant Brett and Les respectively. Other players in the group will be called upon to play the Monks or other mercenary forces that get engaged in the battles.
Each player starts with 30 points of troops. These are divided into their main force and their baggage train. The maximum size for either of these forces is 24 points, but of course if you put 24 points into your attack, then you are only leaving 6 points to guard the baggage! These forces will grow (or shrink) as the campaign progresses. After each battle the player has the chance to shift forces between the two groups.
The starting roster for the campaign is attached (blank). Each player must purchase 1 Hero, 2 other Samurai, a musician, banner bearer, sergeant, group of archers and group of spearmen. This adds up to 24 points leaving 6 points for the player to 'purchase' other troops. All points must be spent and no points can be carried over.
Note that:
- Any troops with blood drops may carry some over to the next battle. One blood drop will heal automatically (time delay) after each battle. Players can remove further blood drops by resting (e.g. sitting out a battle).
- The maximum number of points that can be in a force is 24 if commanded by the Hero, or 15 if commanded by a non-hero Samurai
- The regular campaign rules apply whereby Samurai given fate cards can retain one of these cards at the end of the battle.
- Injuries to Heroes are also carried over to the following battles. If a Hero is killed it will cost 2 Gold to pay healers to bring him back and an associated time delay.
|
| ||||
GOLD
Each team also starts with 6 gold coins. At the start of each battle players will be given options for how they can spend their gold;
Each team also starts with 6 gold coins. At the start of each battle players will be given options for how they can spend their gold;
- Reinforcements: 1 gold for 1 point of troops (may not go above limits set above for command)
- Upgrades: As listed in the table under force composition and available to troops after a battle
- Mercenaries: 1 gold for 2 points of troops (but only stay around for one battle and may be paid off)
- Scouts/information: 1 gold for bribing of local informants/spies prior to a battle
- Stores: As the campaign advances the players may need to buy supplies
- Healing: One gold will remove two blood drops, or 2 gold will heal a Hero ‘killed’ in a battle
|
Delays
One of the campaign metrics is essentially the time taken for each force to make it to the top of the mountain while maintaining the health of their force. Delays will provide the monks with more time to organize their defense and perhaps conduct some counterattacks. As the force makes its way up the mountain they will acquire time delays due to;
|
|
Prior to the final battle (The Sacking of the Monastery), the team with the shortest time will gain certain benefits (depending on how much time they have before the other team arrives). This time could be used to;
Playing the Battles
When the games are played, each team plays the same scenario at the same time. Hence two identical battlefields are set-up side by side. Each team provides a commander for the attacking force, and a player to command the Monks in the 'other' battle. So for each battle a team will have the opportunity to achieve their objectives (playing their own force as the attacker), while also stopping the competition from achieving theirs (playing as the defending monks).
- Heal wounds
- Buy upgrades or mercenaries
- Pay off enemy mercenaries
- Buy reinforcements
Playing the Battles
When the games are played, each team plays the same scenario at the same time. Hence two identical battlefields are set-up side by side. Each team provides a commander for the attacking force, and a player to command the Monks in the 'other' battle. So for each battle a team will have the opportunity to achieve their objectives (playing their own force as the attacker), while also stopping the competition from achieving theirs (playing as the defending monks).
Scenario 1: Base Camp
This battle represents the Heroes taking their forces across the border between the Daimyo’s territory and that of the Monks. While the monks are expecting an attack, they have not had a great deal of time to organize their force.
Samurai
Force: Must include the Hero, one other Samurai and other forces listed as Vanguard (up to a total of 24 points).
Objective: Local resistance must be suppressed by killing the local Monks. The force must then secure the bridge (getting a figure or group onto the bridge was deemed sufficient). This must be achieved as quick as possible to avoid delays.
Known resistance: Monks from the local shrine and some villagers (thugs).
Set-up: Start the battle touching the South side of the wall. The wall is more than 1" high and blocks LOS.
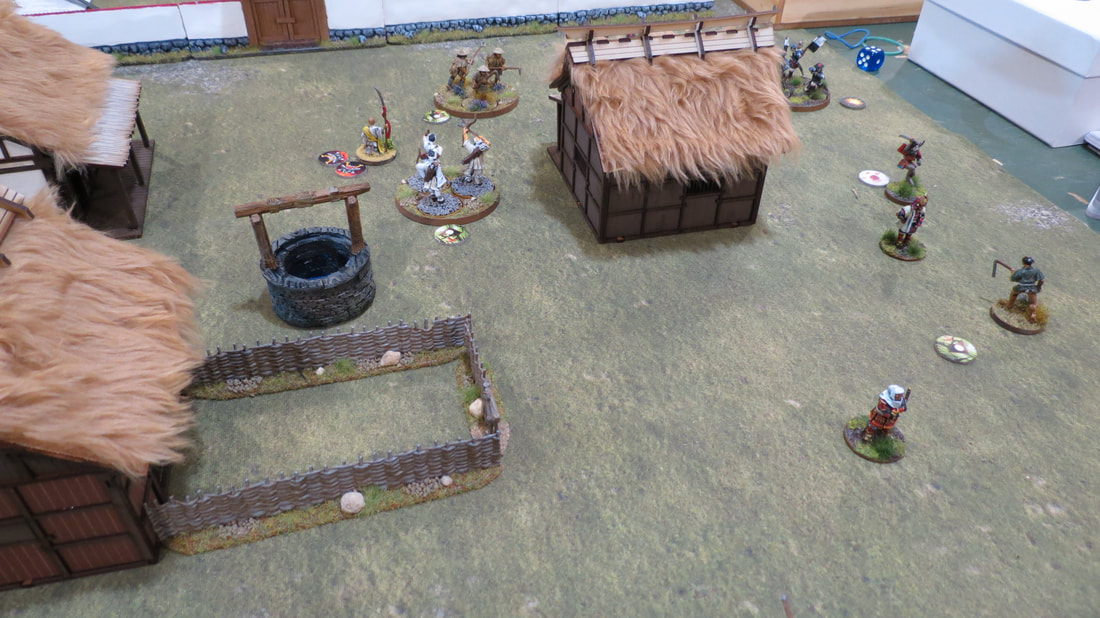
Monks
Force: Monk ‘Samurai’ (4 points) with bow (2 point), Group of Monk Archers (3 Points), 3 Groups of Villagers/Thugs (6 points). The Monks start the game touching a shrine at the centre of the village, Note that if the Monk leaves the village the local resistance will collapse.
Objective: The Monks need to delay the attacking force for as long as possible. This will involve stopping them from reaching the bridge by Turn 6. They will also create an additional delay by killing the attacking Hero. So…attack the Hero and block the Bridge.
Set-up: At the start of the scenario one group of thugs is at the village gate and a second group at the bridge. The remaining group of thugs may be placed anywhere on the table more than 12” from any table edge.
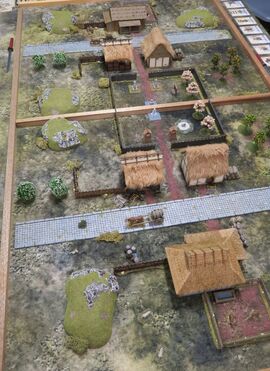
The Village
A battlefield of 3' x 3' should be used. 8" in from the attacking table edge is a wall (LOS block) with a gate in the middle. The attacking force starts on the outside of this wall. 8" in from the opposite table edge is a stream with a bridge in the middle (opposite the gate and roughly 20" away). There are three buildings in the village and some other scatter terrain as appropriate. A small shrine or well should be located in the middle of the village. Troops from both sides may not enter buildings as they have been boarded up by their occupants. Note that exactly the same setup should be used for both teams.
End of Battle
Time delays;
The village will provide enough supplies for the force for the next campaign turn, so you don’t need to ‘eat’ into supplies carried within the baggage this turn. At the end of the game, a Ronin in the area will offer some intel on the Monks next line of Defence for 1 gold.
This battle represents the Heroes taking their forces across the border between the Daimyo’s territory and that of the Monks. While the monks are expecting an attack, they have not had a great deal of time to organize their force.
Samurai
Force: Must include the Hero, one other Samurai and other forces listed as Vanguard (up to a total of 24 points).
Objective: Local resistance must be suppressed by killing the local Monks. The force must then secure the bridge (getting a figure or group onto the bridge was deemed sufficient). This must be achieved as quick as possible to avoid delays.
Known resistance: Monks from the local shrine and some villagers (thugs).
Set-up: Start the battle touching the South side of the wall. The wall is more than 1" high and blocks LOS.
Monks
Force: Monk ‘Samurai’ (4 points) with bow (2 point), Group of Monk Archers (3 Points), 3 Groups of Villagers/Thugs (6 points). The Monks start the game touching a shrine at the centre of the village, Note that if the Monk leaves the village the local resistance will collapse.
Objective: The Monks need to delay the attacking force for as long as possible. This will involve stopping them from reaching the bridge by Turn 6. They will also create an additional delay by killing the attacking Hero. So…attack the Hero and block the Bridge.
Set-up: At the start of the scenario one group of thugs is at the village gate and a second group at the bridge. The remaining group of thugs may be placed anywhere on the table more than 12” from any table edge.
The Village
A battlefield of 3' x 3' should be used. 8" in from the attacking table edge is a wall (LOS block) with a gate in the middle. The attacking force starts on the outside of this wall. 8" in from the opposite table edge is a stream with a bridge in the middle (opposite the gate and roughly 20" away). There are three buildings in the village and some other scatter terrain as appropriate. A small shrine or well should be located in the middle of the village. Troops from both sides may not enter buildings as they have been boarded up by their occupants. Note that exactly the same setup should be used for both teams.
End of Battle
Time delays;
- If the Hero receives a heavy wound this will create a 1 hour delay,
- If the Hero is 'killed' they will incur a 2 hour delay (and cost 2 gold to heal). They will also acquire a heavy wound.
- If the attackers reach the bridge before turn 6, they will gain 1 hour of time.
- If the attackers have not reached the bridge by the end of turn 6 they will lose 1 hour.
- Patching up wounds will take 5 minutes per blood drop (if a model or group has more than one blood drop they will start the next battle with one blood drop)
- Fallen Ashigaru take 30 minutes of time per casualty.
The village will provide enough supplies for the force for the next campaign turn, so you don’t need to ‘eat’ into supplies carried within the baggage this turn. At the end of the game, a Ronin in the area will offer some intel on the Monks next line of Defence for 1 gold.
Scenario 2: The Spy
Having secured a foothold at the base of the mountain the attacking force approaches the next village on the mountain trail. Prior to Nobunaga’s instructions to destroy the monastery, the Astute commander (that’s you), sent spies ahead to collect information and assist in the coming campaign.
One of these spies is in the next village, Kanohata, and has vital information that will make the following assault much easier. The attacking player must find the spy and escort them from the battlefield while the Monks attempt to find the spy and prevent the attackers from gaining the information.
Terrain
The game is played on a 3’ x 3’ table. In the middle of the table is a small village (three buildings) with a scatter of fences and other terrain items. Three objective markers are placed at the entrances to the buildings. Markers should be at least 12’ away from any table edge and represent the possible locations for the spy.
Deployment
The attacking player can deploy up to 21 points from his force for the attack. Note that the remaining forces (which must include at least one samurai) will be left to defend the baggage against potential raiders (the next scenario). Prior to the battle the player may also spend gold to employ mercenaries in their attacking force. Available mercenaries include;
Your scouts report that the Monks will deploy 16+1D6 points of troops for this battle. For ½ a gold coin you can see the D6 roll before deciding on the size of your force (including mercenaries).
Players flip a coin to see who deploys first; and takes the first token during the game. Players take turns deploying their warriors up to 6” onto the table, starting with their samurai hero, then other Samurai and lastly commoners.
Having secured a foothold at the base of the mountain the attacking force approaches the next village on the mountain trail. Prior to Nobunaga’s instructions to destroy the monastery, the Astute commander (that’s you), sent spies ahead to collect information and assist in the coming campaign.
One of these spies is in the next village, Kanohata, and has vital information that will make the following assault much easier. The attacking player must find the spy and escort them from the battlefield while the Monks attempt to find the spy and prevent the attackers from gaining the information.
Terrain
The game is played on a 3’ x 3’ table. In the middle of the table is a small village (three buildings) with a scatter of fences and other terrain items. Three objective markers are placed at the entrances to the buildings. Markers should be at least 12’ away from any table edge and represent the possible locations for the spy.
Deployment
The attacking player can deploy up to 21 points from his force for the attack. Note that the remaining forces (which must include at least one samurai) will be left to defend the baggage against potential raiders (the next scenario). Prior to the battle the player may also spend gold to employ mercenaries in their attacking force. Available mercenaries include;
- Travelling Samurai – 2 Gold
- Group of Thugs – 1.5 Gold
Your scouts report that the Monks will deploy 16+1D6 points of troops for this battle. For ½ a gold coin you can see the D6 roll before deciding on the size of your force (including mercenaries).
Players flip a coin to see who deploys first; and takes the first token during the game. Players take turns deploying their warriors up to 6” onto the table, starting with their samurai hero, then other Samurai and lastly commoners.
|
Objectives
Search the village to find the spy and escort them back to your starting table edge. To search an objective a unit needs to be within 3” of the objective token. An action can be used to conduct a search action (Test of Wits). The first successful search locates the spy. Note that a search cannot be conducted if an enemy warrior is within 3” of the objective marker. While being escorted the spy cannot be attacked or harmed in any way and does not block shooting or charges. A units movement is reduced to 5” per action while escorting the spy. If the escorting warrior is cut down or forced back by an enemy melee action then the control of the spy passes to the attacker. If the controlling warrior loses his nerve or is cut down by shooting then the spy will hide in the nearest terrain. Ending the Battle As soon as a warrior escorting the spy reaches his starting table edge, his force has won – the battle ends immediately. |
|
Scenario 3: Baggage Raid
While your main force is returning from it's attempt to secure the spy, the remainder of the force left at a small crossroad guarding the supplies, comes under attack. As night approaches the Ninja’s, employed by the monks to slow down your advance, move in.
Terrain
The game is played on a 3’ x 3’ table. In the middle of the table is a tea house surrounded by a wall. It sits on a crossroad with North leading up the mountain. Five objective markers are placed within the compound (scattered evenly around). There are also 2 lanterns situated in the garden (one by the gate to the compound and the second by the door of the teahouse).
Deployment
The defending force consist of those troops not engaged in the previous scenario. Two figures from the defending force are acting as sentries while the remainder (including the Lieutenant) is within the tea house. You may also purchase reinforcements (spend up to 3 gold) that will arrive on Turn 3 of this battle from the Southern table edge. The Ninjas (12 points led by a Ninja lieutenant) enter along either the East or West table edge (start 6” in from the walls of the teahouse compound). Night has fallen as the game starts
Objectives
The Ninja force has been hired to destroy the supplies of the invading force. A ninja that is adjacent (within 1") to a baggage item with no ‘blue’ force within 3” may attempt to set the baggage alight as an action (roll a test of wits). If successful the baggage is set alight and is considered destroyed (as well as being a light source for the rest of the game).
If a sentry is engaged by the Ninja but not killed, or killed within sight of another friendly model (may require a test of wits if in LOS but not by a lantern) then the alarm has been raised; add the remainder of the blue force tokens into the cup at the end of the turn. Similarly the alarm is raised if an objective marker is set alight.
Ending the Battle
The main force will return on Turn 6 or 7. At which point the Ninja will immediately leave. At the end of turn 6 roll a die, 1-3 the battle ends, 4-6 play one more turn. Each baggage point destroyed will generate a one hour delay for the force.
Scenario 4: The Armory or The Shrine
After waiting for supplies and foraging in the local area (make up loses from the last battle) the players have a choice of which path to take up the mountain. Options include;
Once again the force will be split in two with the Vanguard taking the lead in the next battle and the remainder protecting the baggage and rear of the force. The objective of course is to get to the Monastery first, however, shrines can be a great source of wealth and this could avoid leaving an enemy force to the rear. The player could also split the force and attack both locations.
The next village up the mountain is known as The Armory and is the home of blacksmiths and armorers that produce muskets for the Monks and other warlords in the area.
Each of the teams chose a different option with Paul/Les going for the Shrine and Greg/Brett charging up the mountain.
While your main force is returning from it's attempt to secure the spy, the remainder of the force left at a small crossroad guarding the supplies, comes under attack. As night approaches the Ninja’s, employed by the monks to slow down your advance, move in.
Terrain
The game is played on a 3’ x 3’ table. In the middle of the table is a tea house surrounded by a wall. It sits on a crossroad with North leading up the mountain. Five objective markers are placed within the compound (scattered evenly around). There are also 2 lanterns situated in the garden (one by the gate to the compound and the second by the door of the teahouse).
Deployment
The defending force consist of those troops not engaged in the previous scenario. Two figures from the defending force are acting as sentries while the remainder (including the Lieutenant) is within the tea house. You may also purchase reinforcements (spend up to 3 gold) that will arrive on Turn 3 of this battle from the Southern table edge. The Ninjas (12 points led by a Ninja lieutenant) enter along either the East or West table edge (start 6” in from the walls of the teahouse compound). Night has fallen as the game starts
Objectives
The Ninja force has been hired to destroy the supplies of the invading force. A ninja that is adjacent (within 1") to a baggage item with no ‘blue’ force within 3” may attempt to set the baggage alight as an action (roll a test of wits). If successful the baggage is set alight and is considered destroyed (as well as being a light source for the rest of the game).
If a sentry is engaged by the Ninja but not killed, or killed within sight of another friendly model (may require a test of wits if in LOS but not by a lantern) then the alarm has been raised; add the remainder of the blue force tokens into the cup at the end of the turn. Similarly the alarm is raised if an objective marker is set alight.
Ending the Battle
The main force will return on Turn 6 or 7. At which point the Ninja will immediately leave. At the end of turn 6 roll a die, 1-3 the battle ends, 4-6 play one more turn. Each baggage point destroyed will generate a one hour delay for the force.
Scenario 4: The Armory or The Shrine
After waiting for supplies and foraging in the local area (make up loses from the last battle) the players have a choice of which path to take up the mountain. Options include;
- Continue up the mountain directly towards the Monastery, passing through the Armory.
- Follow a longer path that leads past a prominent shrine on the mountain.
Once again the force will be split in two with the Vanguard taking the lead in the next battle and the remainder protecting the baggage and rear of the force. The objective of course is to get to the Monastery first, however, shrines can be a great source of wealth and this could avoid leaving an enemy force to the rear. The player could also split the force and attack both locations.
The next village up the mountain is known as The Armory and is the home of blacksmiths and armorers that produce muskets for the Monks and other warlords in the area.
Each of the teams chose a different option with Paul/Les going for the Shrine and Greg/Brett charging up the mountain.
Scenario 5: It's A Trap
After healing their wounds, Paul and Les are now well behind Greg and Brett as they make their way up the Mountain. In fact they are now on the same trail with the enemy forces more than an hour ahead of them. Knowing that Paul and Les are following behind, Greg leaves a portion of his army to delay them further.
Terrain
The game is played on a 3’ x 3’ table. The single track up the mountain winds its way through some heavy forest with off road movement quite restricted. A single hermits shack is at the end of a short side road. Visibility through the forest is restricted to 3". Movement through the forest costs 2"for every inch moved. Note that around half of of the table is heavy forest with other areas representing the track or lighter woods. As the track is winding it's way up the mountain their should be some areas designated as steep/difficult terrain.
Deployment
Paul and Les deploy their forces in a small clearing at the start of the track (a 6" semi-circle on the Southern table edge). Greg's forces are already deployed on table out of line of sight of the advancing army; a map is prepared prior to the battle). Greg can choose any points worth of troops up tp 15 points for this battle, however, any troops selected for this battle will not be available for the main battle (Scenario 6). Paul and Les have up to 24 points (vanguard) on table.
Objectives
Paul's forces must successfully move off the Northern table edge. Greg and Brett's small force must attempt to do as much damage as they can to the advancing enemy and delay their progress even further.
Ending the Battle
As soon as a non-samurai warrior exits the Northern table edge the game ends. If the game has not ended by turn 6, then roll a die at the end of turn 6 (1-3 game ends, 4-6 play one more turn).
Scenario 6: The Temple
After smashing through Greg and Brett's pitiful blocking force Paul and Les, now bandaged and limping, make their way to the top of the mountain.
Terrain
The game is played on a 3’ x 3’ table. On the Northern edge of the Board is the Monks temple sitting on a small plateau. Between the Temple and the Southern table edge is a small village of a couple of huts, fences and some animals etc. (essentially creating a direct line of sight block between the two forces when they initially deploy. A scattering of other vegetation completes the scene.
Deployment
The temple is being guarded by a small force of Monks (Ashigaru) with the Head Monk inside, praying. By the main entrance to the temple is a group of Monks with Naginata and a Monk with a Musket. At the Eastern and Western ends of the temple are single Monk Bowmen. Brett and Paul enter on the Eastern edge no more than 18" from the Southern table edge and can deploy up to 6" onto the table. Similarly Greg and Brett enter the Western edge in a similar deployment zone. Given their rush to get to the battle on times, all of Paul's forces start the game with a blood drop.
Objectives
Whoever kills the Head Monk wins the campaign. To kill the monk a unit/figure must first enter the Temple (takes one action), they can then seek out and fight the Monk on subsequent actions. Note that the Monks are treated as a third player and draw tokens as normal. For this battle, tokens that cannot be used are placed back into the pool, not handed to the next player.
Ending the Battle
The game ends only when the Head Monk is dead, or, all of the attackers are defeated!
|
Results Game 1: Both teams accomplished the objective of getting to the bridge before the end of Turn 6; in fact both teams achieved the objective on Turn 6, so a good tight finish for both teams. Team Greg Team Paul Time (Scenario) 0 0 Casualties 1 Ashigaru 1 Ashigaru Blood Drops 5 Blood Drops 3 Blood Drops Total Time 55 minutes 45 minutes Game 2: Both teams paid the travelling Samurai to boost their ranks but neither team accomplished their objective as the Monks charged forward (not caring for their own safety), found the spy and escorted them from their field. A mixture of luck and strategy! All over by turn 3! Team Greg Team Paul Time (Scenario) 1 hour 1 hour Casualties nil nil Blood Drops nil 4 Blood Drops Total Time 1 hour 1 hour 20 minutes Notes for Battle 4: Greg/Brett's Wise Samurai is 'Drained'. Both sides also took the opportunity to purchase an additional group of archers; arrive on Turn 3 of Game 3. Game 3: The Ninja's entered each of the compounds and successfully set alight to one point of baggage before the alarm was raised. A second baggage point was lost in each battle as the defenders scrambled to respond to the Ninja threat. Team Greg Team Paul Time (Scenario) 2 hour 2 hour Casualties 1 Ashigaru 2 Ashigaru Blood Drops nil 2 Blood Drops Total Time 2 hour 30 minutes 3 hours 10 minutes Game 4: As Paul's force entered the Shrine they encountered a group of Ronin thugs that had beaten them to it. They managed to fight off the force and gather 4 gold, but at what cost, both Samurai engaged in the battle were cut down!. Further up the mountain Greg's Samurai Bunny bounded past the enemy muskets, but had to come back for his men! It took the full 6 turns, but casualties were relatively light as the Monks continually shot themselves in the foot! Team Greg Team Paul Time (Scenario) 0 0 Casualties 3 Ashigaru 2 Samurai Blood Drops nil nil Total Time 1 hour 30 minutes 2 hours In addition, the death of Paul's Hero will cost him two gold to heal and his Hero will not get to role on the injury chart in the next battle. Game 5: In a perfectly coordinated attack, Greg's archers struck out at the advancing army, forcing the lead elements to dodge their arrows and leaving them vulnerable to a ground assault. Unfortunately, the ground assault failed to score any hits and the ambushing force was wiped out...to the man! As these troops were 'excess' to requirements this has no impact on the final battle for Greg and Brett. As the ambush failed to inflict any significant damage, or even a blood drop, there was no additional time delay imposed on Paul...or loss of forces for the final battle. Victory Total Time delay incurred by each team is starting to trend in favour of the Greg/Brett team, especially with the time delay incurred due to Samurai casualties in Paul's team for Game 4. Note that both players will start the final scenario at the same time, however, the player with the time advantage will have the opportunity to conduct recon, spy, heal etc. prior to the climactic battle. The team running late may also be penalized by recieving blood drops to start the battle with! Time delays end of Game 5 Greg/Brett - 5 hour 55 minutes Paul/Les - 7 hour 15 minutes I hadn't formalized this at the start of the campaign, but something like; 0-1 hours, no penalty, 1-2 hours blood drops, more than that, blood drops and some other advantage. Consequently, team Paul/Les was allocated blood drops (one per unit) for their forces at the start of Game 6. Game 6: An interesting final tussle. Despite the blood drops, Greg/Brett's failure to score hits or successful dodging meant that Paul/Les didn't really feel the impact of this penalty until later in the game. Hence early points go to Paul/Les as Greg/Brett suffered a number of Ashigaru deaths. However, after this initial set-back, it was Greg/Brett who forced their way onto the plateau, entered the Temple and finally defeated the Head Monk. THE END |
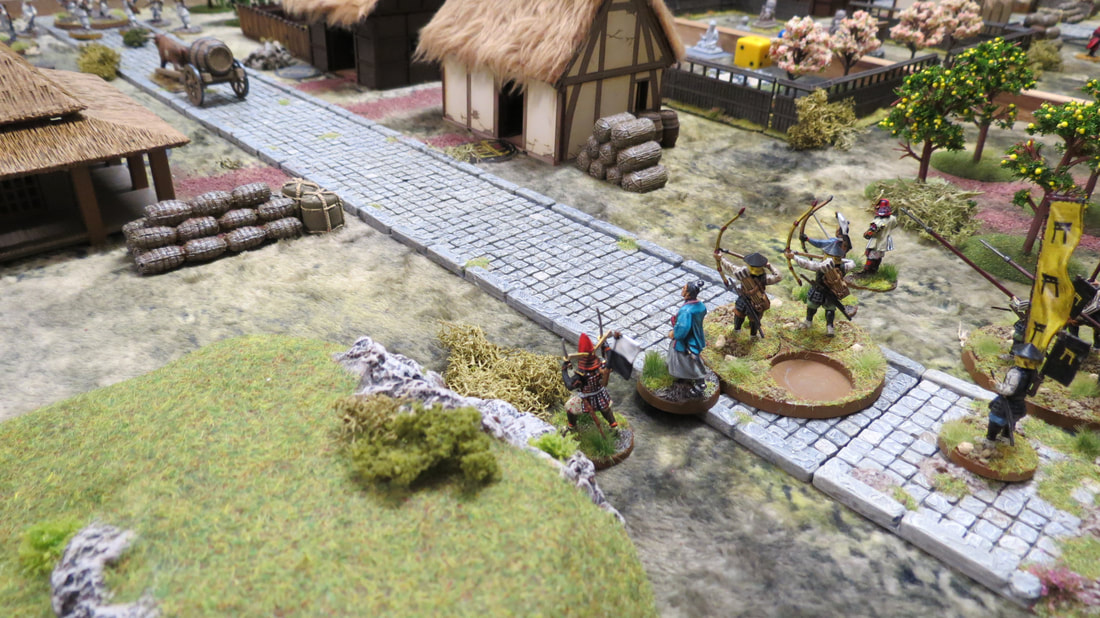
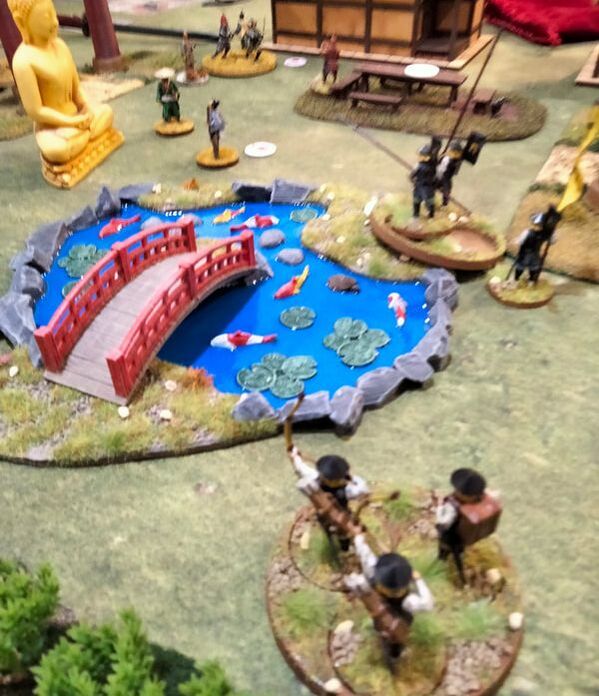
Paul's forces attempt to rush past the decorative pool to get to t he shrine, but get mugged on the way. Meanwhile, Greg attempts to outflank the Monks shooting from their towers.
|